MAKING OF.
How I edited my photo "Maneuver"
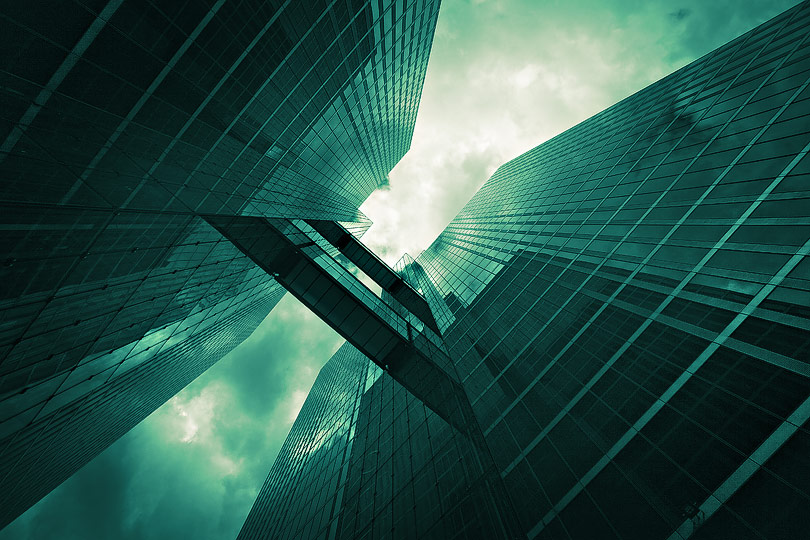
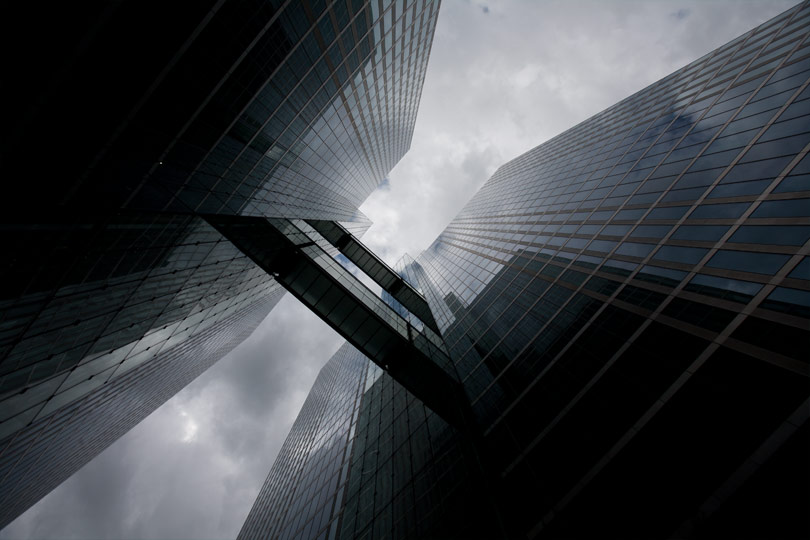
This photo was shot between two skyscraper towers in Munich and should be converted into a futuristic image. For this purpose I exclusively use Adobe Lightroom this time.
01
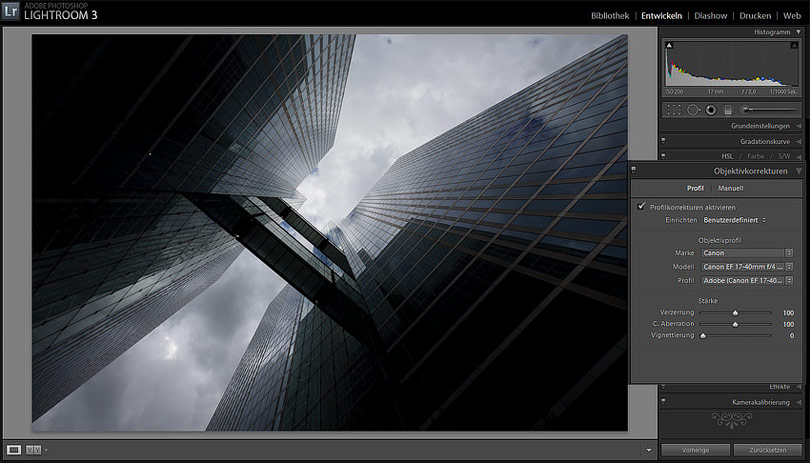
First I activate lens correction to get rid of chromatic aberrations and distortions. Vignetting is intentionally not affected as it's important for the overall impression.
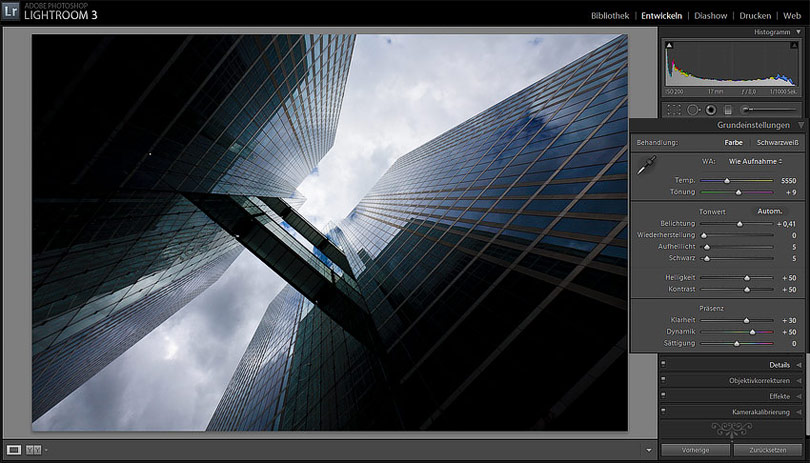
02
In the basic panel I increase exposure, contrast, saturation und clarity. Furthermore I increase fill light just a bit to recover details in the shadows.
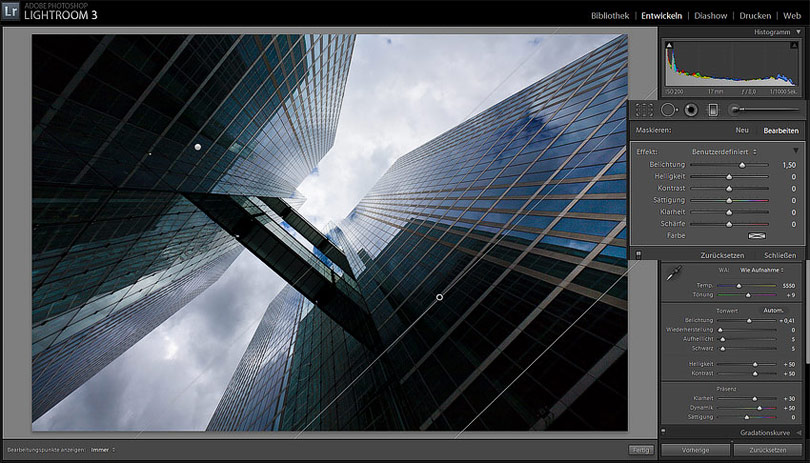
03
With two graduated filters I drag from the dark corners to the center of the image and increase exposure with 1.50 EV.
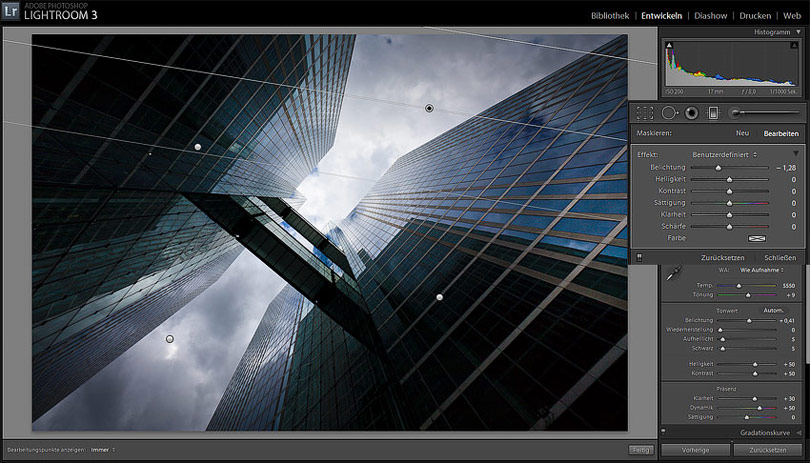
04
I repeat this step, this time I use negative exposure to darken the upper and lower part of the image.
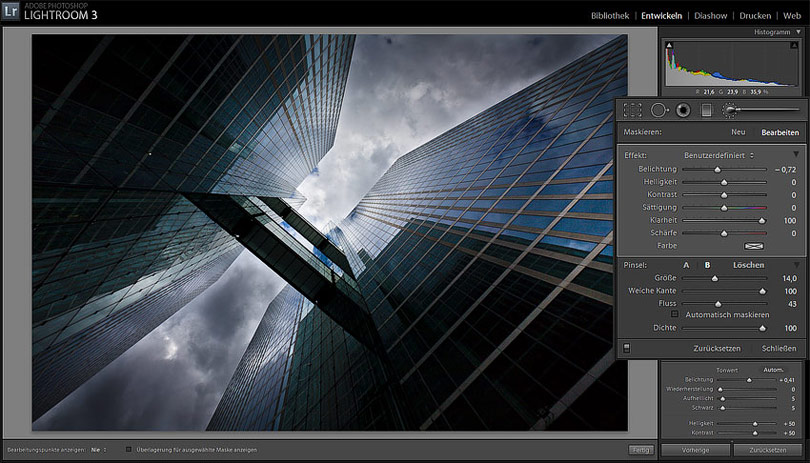
05
With the adjustment brush I increase clarity in the clouds and darken this area at the same time to create a gloomy mood.
06
I use the adjustment brush a second time with a maxmimum amount of clarity to create an even stronger mid tone contrast.

07
With a big, soft brush and slightly increased exposure I paint in the center of the image to draw attention to this part.

08
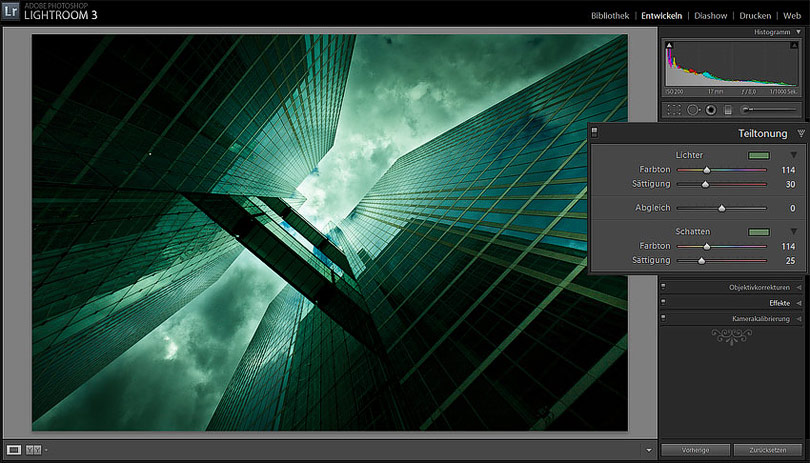
In the split toning panel I apply a green hue in the shadows and highlights.
09
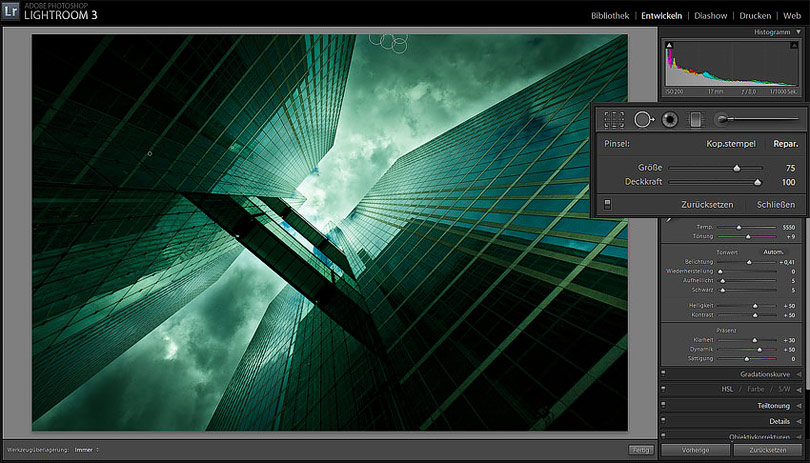
Finally I remove dust spots withe the spot removal tool.
10
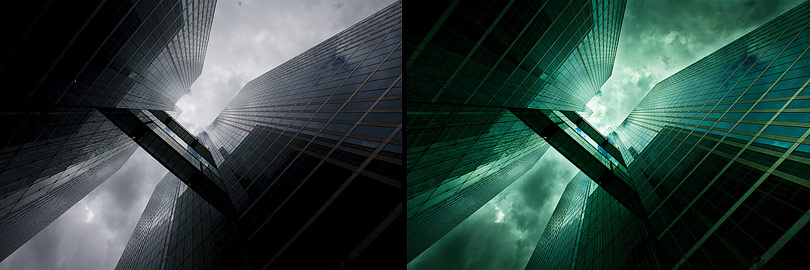
Move the slider to compare the original photo with the final result (Mozilla Firefox). In the Internet Explorer alternatively click on any position.