MAKING OF.
How I edited my photo "Melnikfall"
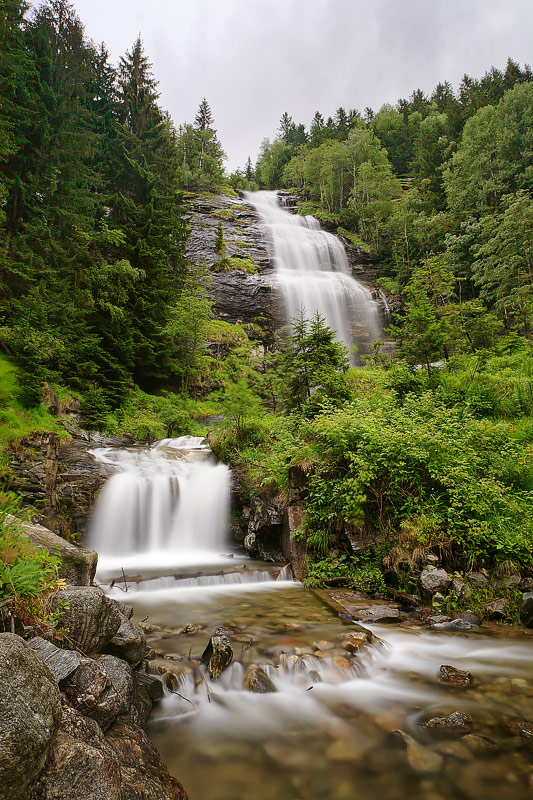
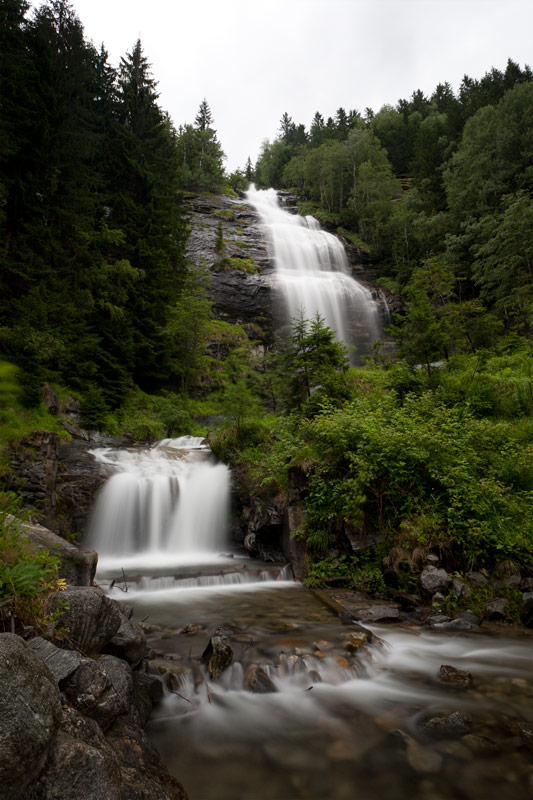
The photo displays the Melnik waterfall in the Malta valley in Carinthia, Austria. Although the picture was shot during the day with overcast weather I had to use exposure bracketing to get all details in the shadows and highlights. The problem can be solved by creating a HDRI (high dynamic range image). In this case I chose the alternative way DRI (dynamic range increase). The four images are processed in Adobe Lightroom and manually blended in Adobe Photoshop.
01
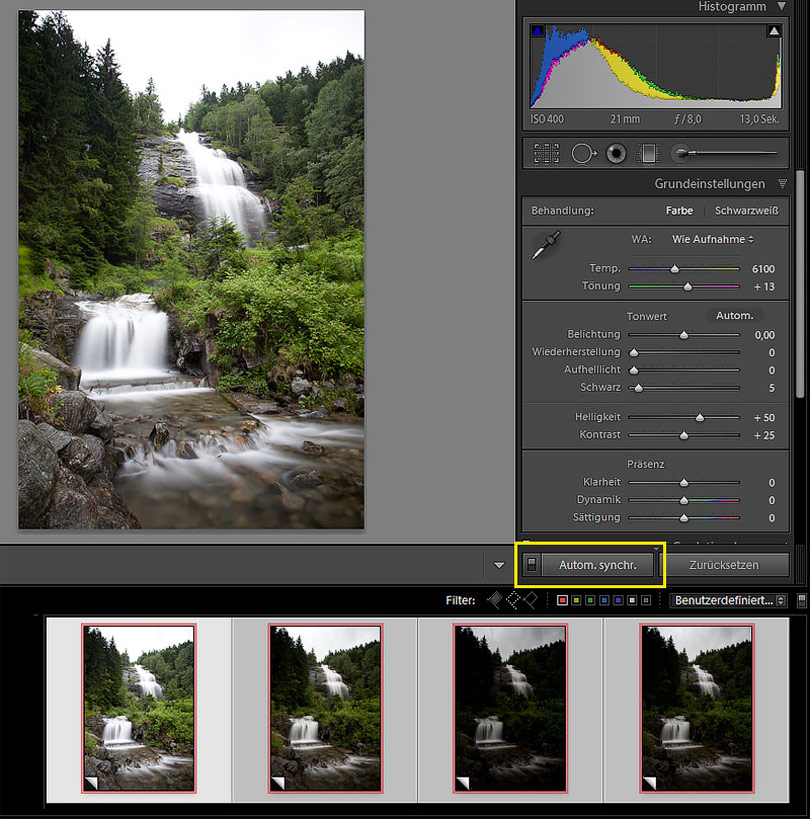
In the first step I import all four images in Adobe Lightroom, select them and activate the button "Auto Sync", so every following step is synchronized between the single images.
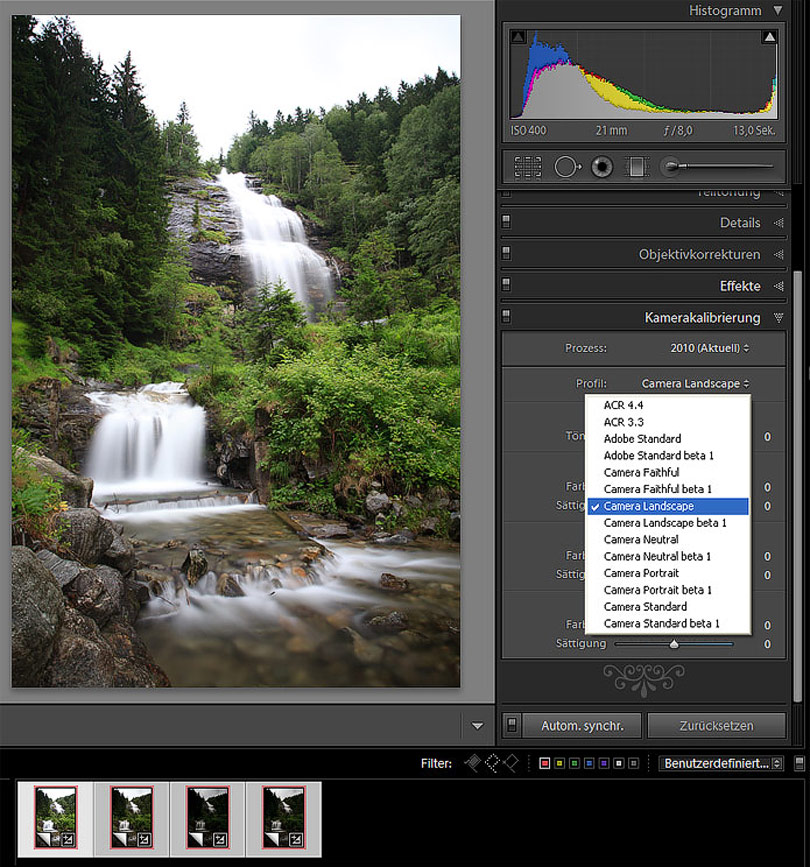
02
I change camera calibration to "Camera Landscape" as it accentuates the green and blue tones. An alternative is "Camera Portrait" but all other options are not recommended for landscape photography.
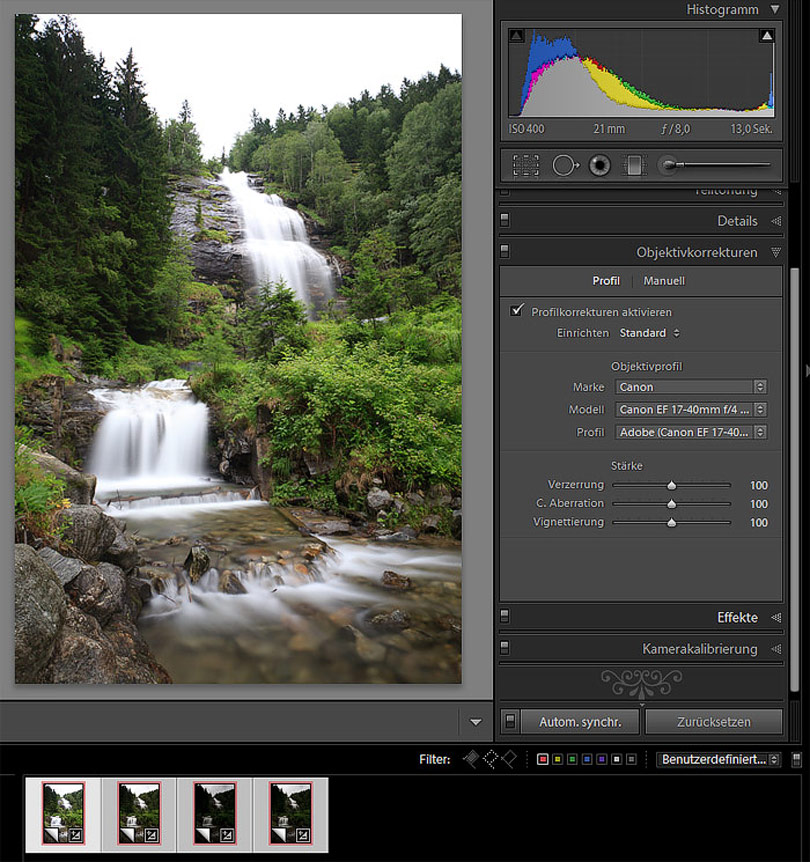
03
Next I activate lens correction which removes lens distortion, chromatic aberrations and vignetting.
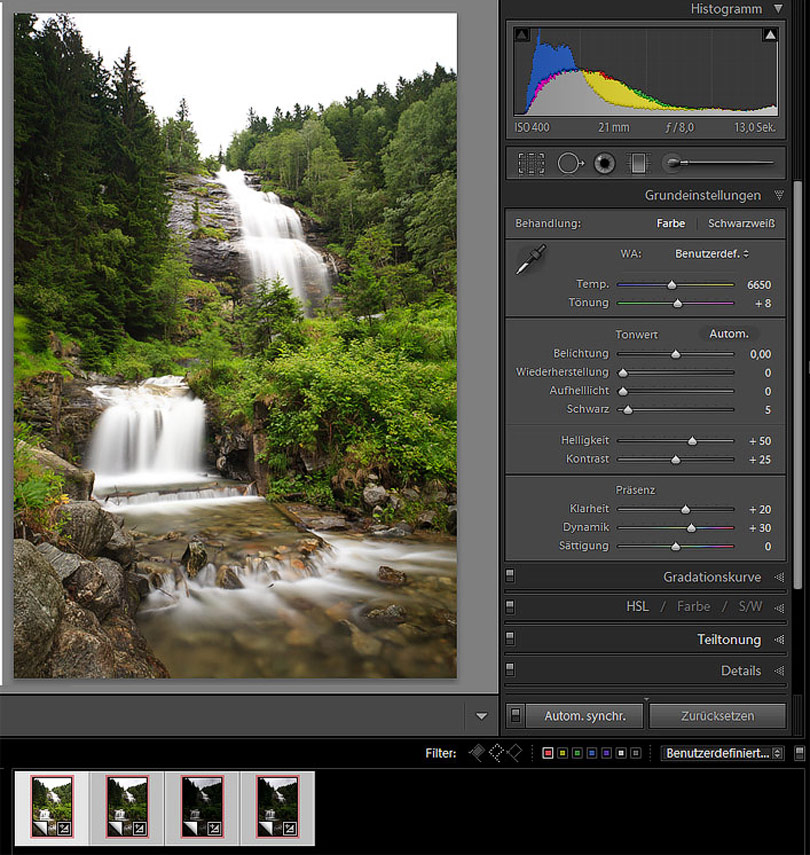
04
Finally I increase the values for vibrance and clarity and correct white balance.
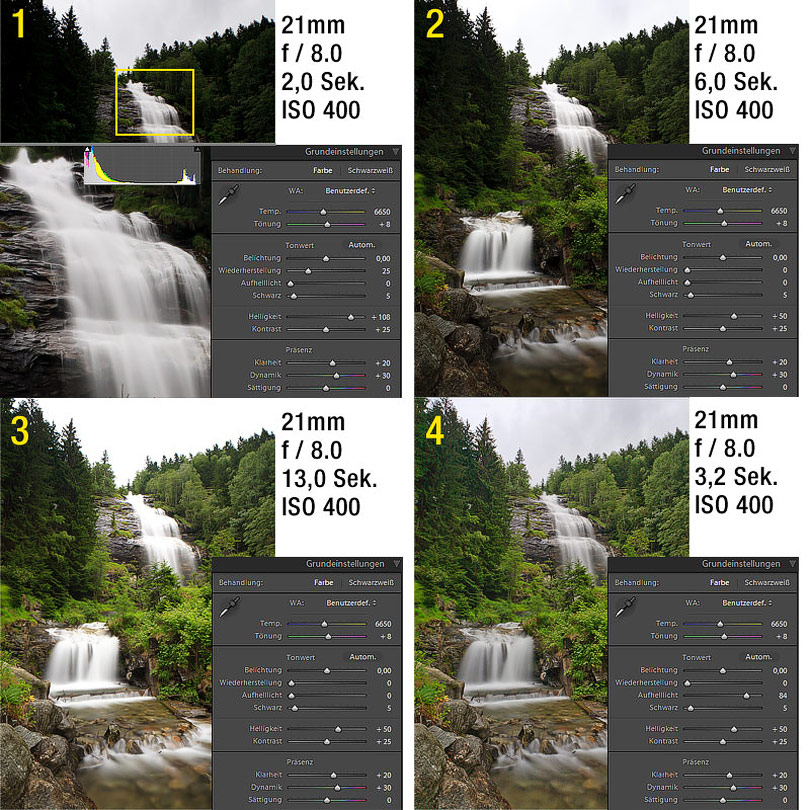
05
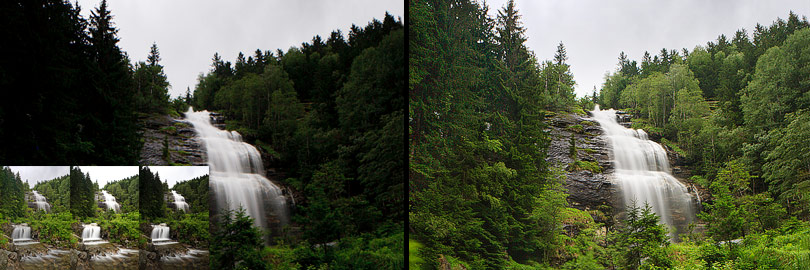
Before blending the images in Photoshop, every single image gets individual adjustments to optimize the important areas ("Auto Sync" has to be deactivated). Image one: the upper part of the waterfall. Image two: the water in general. Image three: general exposure of the forest. Image four: the sky and the top of the trees.
06
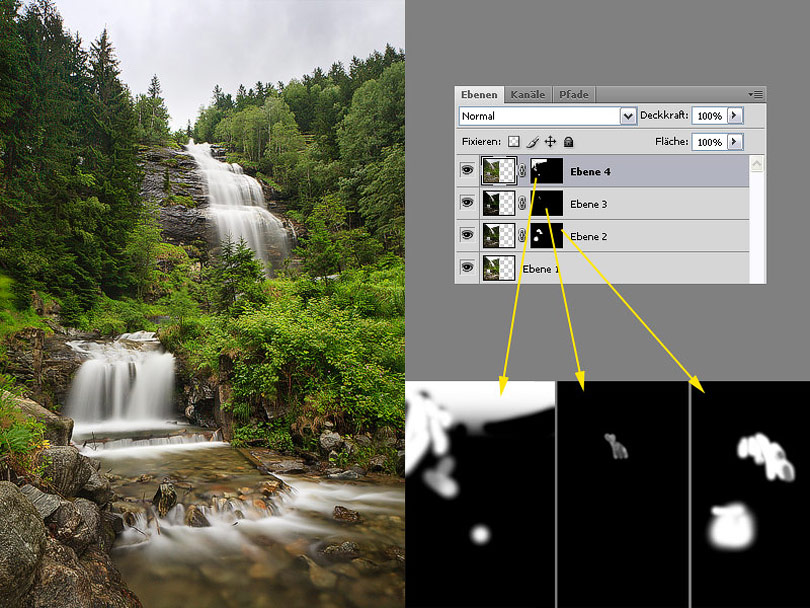
The four images are exported and opened in Photoshop with the command "File > Scripts > Load Files into Stack ..." which transfers them into a new file. For blending I use this technique: The best exposed image is moved to the bottom of the layer palette, all other images get a black layer mask. With a white soft brush I paint back those areas which are important.
07
Move the slider to compare the original photo with the final result (Mozilla Firefox). In the Internet Explorer alternatively click on any position.