MAKING OF.
How I edited my photo "Explosive Nine"
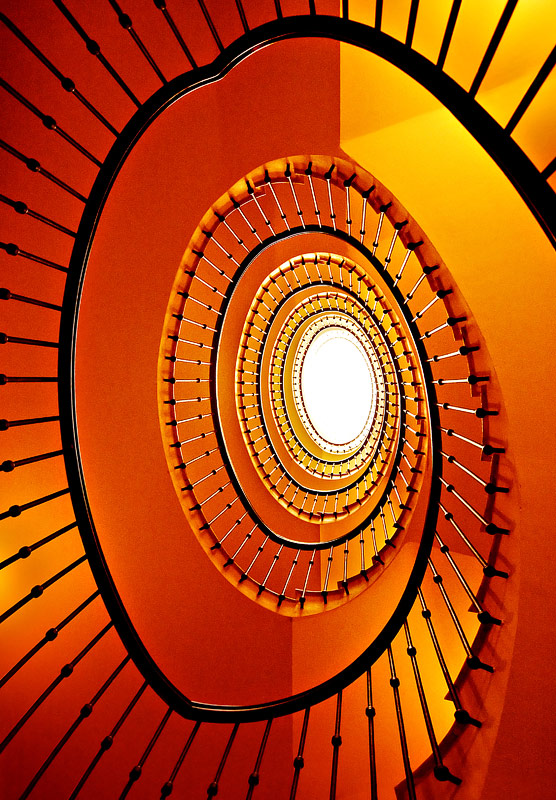
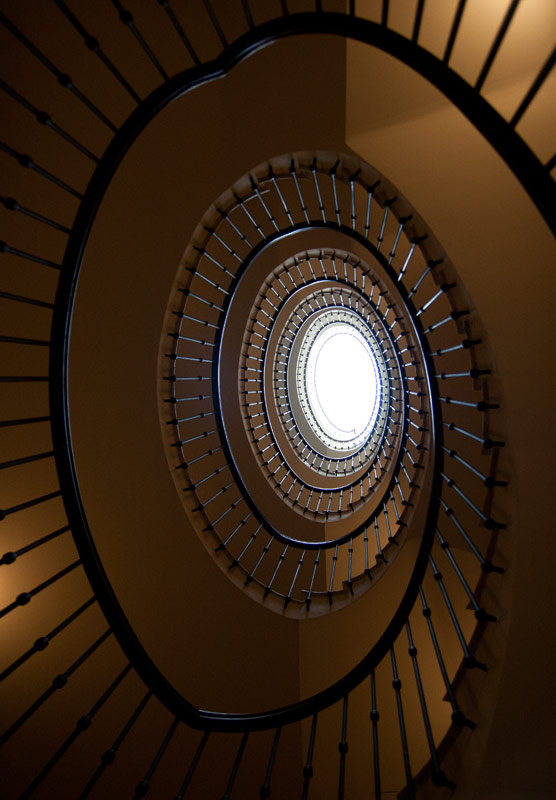
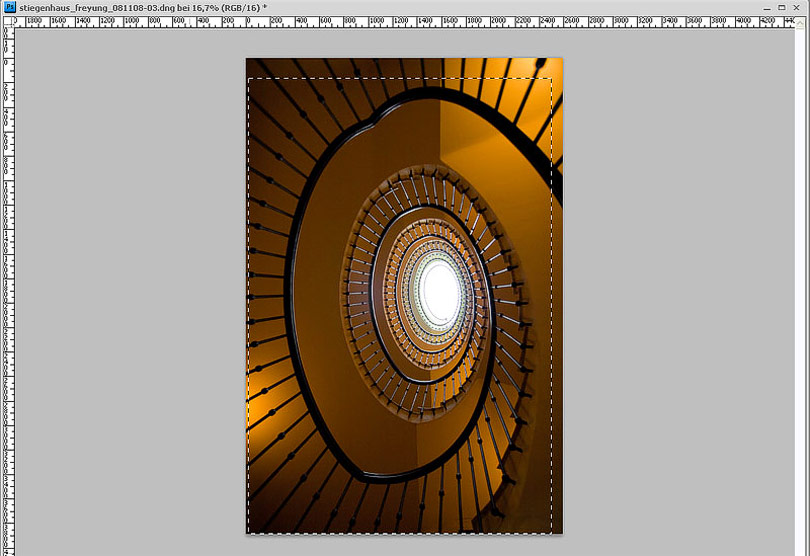
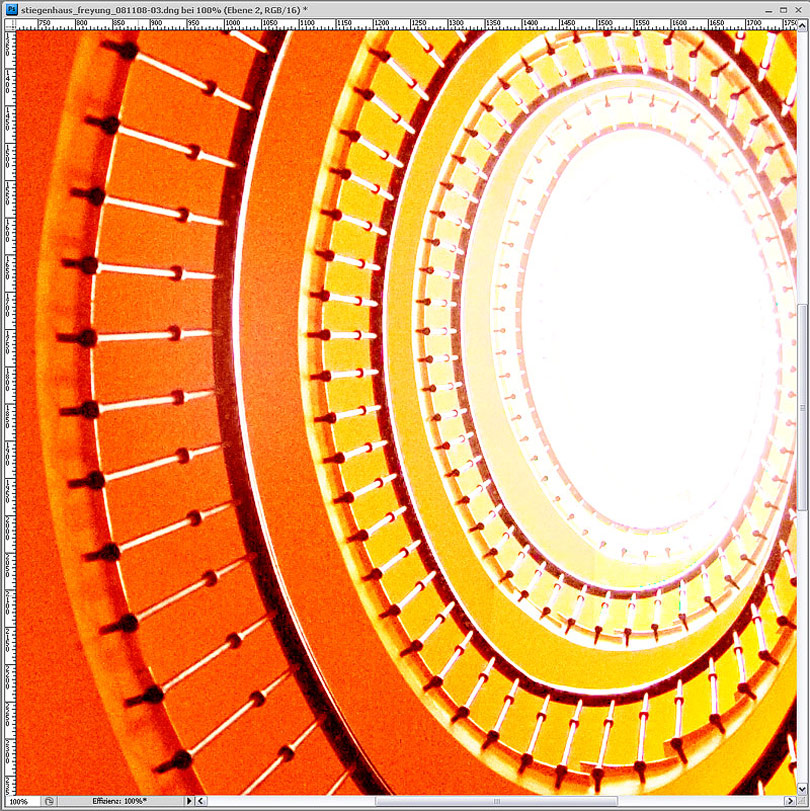
I took the photo in a Viennese staircase. As I had no tripod with me I had to use maximum aperture and a high ISO value to get a relatively short shutter speed and to make sure the photo doesn't become blurred.
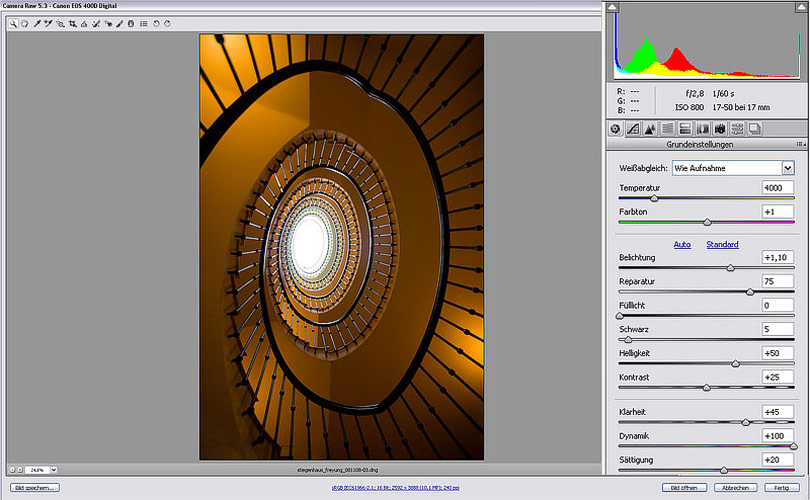
01
In the first step I make global adjustments in Camera Raw. Exposure is highly increased and with Recovery I bring back details in the highlights. Clarity accents edges, Vibrance and Saturation increase the overall saturation.
02
In Photoshop I convert the background layer to a normal layer with a double click and flip the image horizontally: CTRL-/CMD-T, then right click > Flip horizontal (not shown in the screenshot). Next the bleed is set a bit tighter. Use the rectangular marquee tool to select the area of your choice and click "Image > Crop".
03
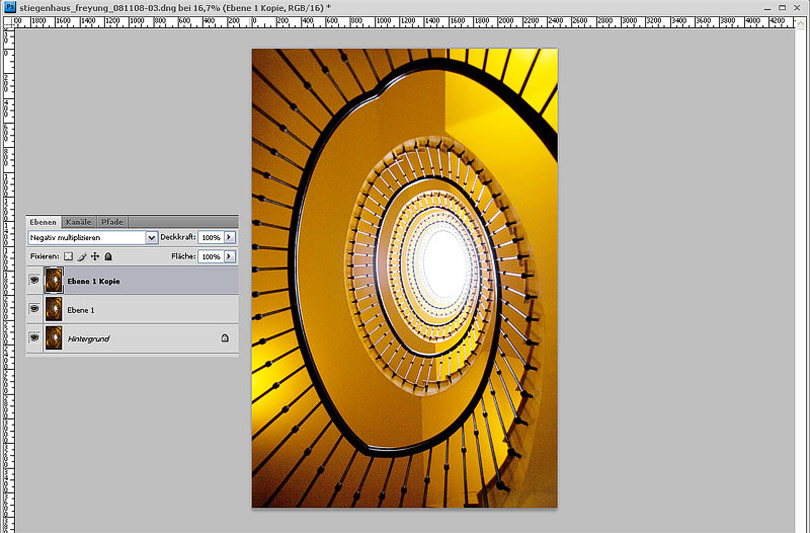
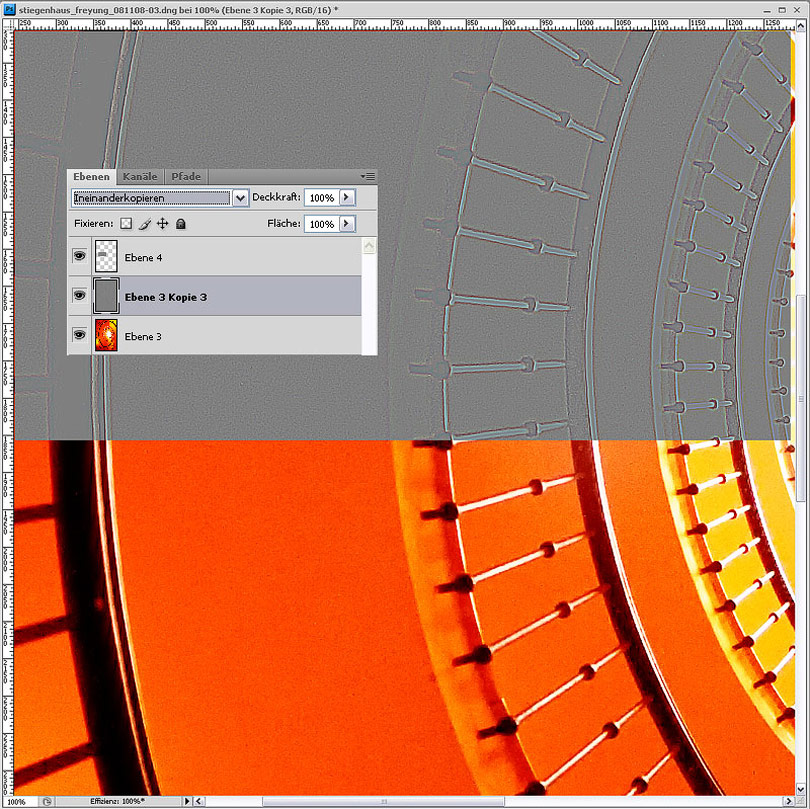
To brighten an image you don't always need levels. In this case I duplicated the layer in "Overlay" mode. As this was not enough I did the same again with the created layer.
04
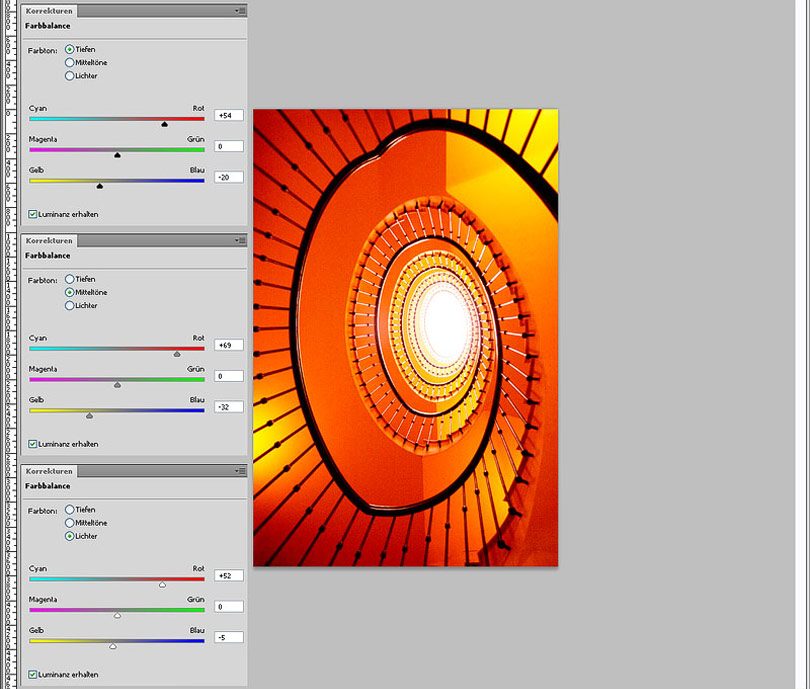
Now colors are changed with a Color balance adjustment layer. Shadows, mid tones and highlights are moved to red and yellow in different amounts.
05
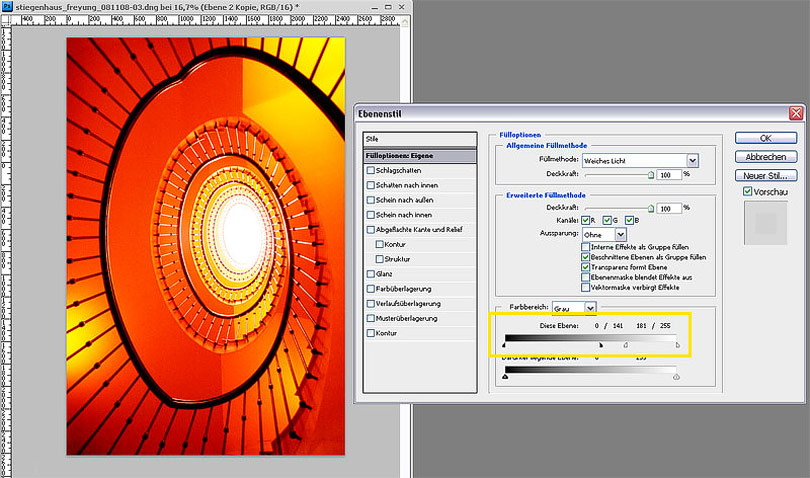
To get glowing colours, merge all layers (CTRL/CMD-SHIFT-ALT-E) and strongly blur with the Gaussian Blur filter. Change layer mode to "Soft Light". In the layer style dialog shadow and some highlight areas are excluded by blending.
06
To increase mid tone contrast I again merge all layers and apply the "Unsharp mask" filter with an amount of 30 % and a radius of 60px. To avoid halos I exclude the effect from the shadows and highlights. To achieve this I open the blending options and with hold down ALT/Option key I drag the white and black slider a bit to the center so the enhanced edge contrast only applies in the mid tones.
07
With a noise reduction plug-in I blur large areas. I use Nik Dfine but other software like Noise Ninja or Neat Image is good, too. I would not recommend Photoshops function "Reduce noise" as its results are not clean.
08
To apply high pass sharpening duplicate the photo layer in mode "Overlay". Use the high pass filter with an amount of about 2px depending on image resolution.
09
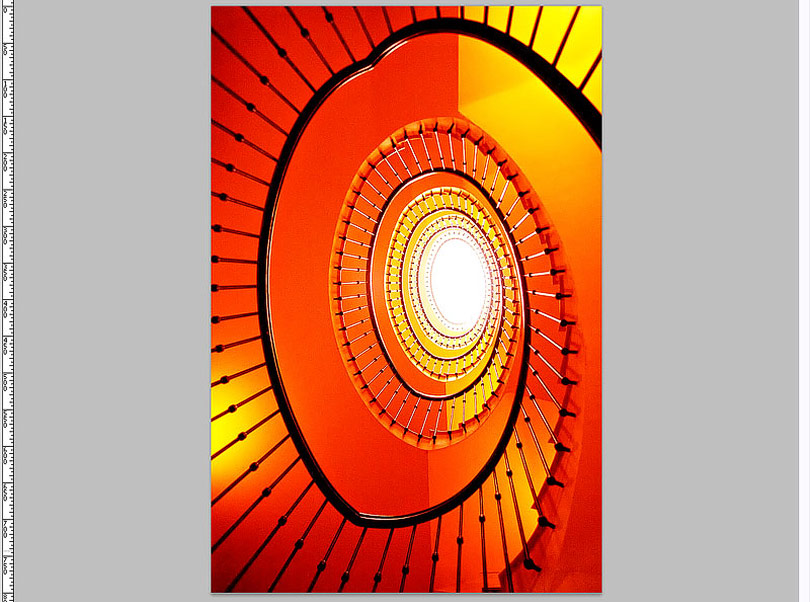
Everything's done and the image can be scaled down and sharpened for the internet.
10
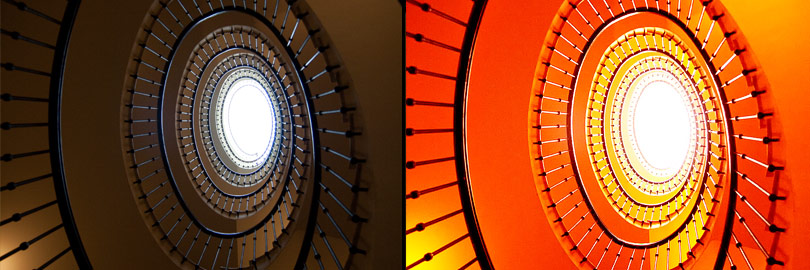
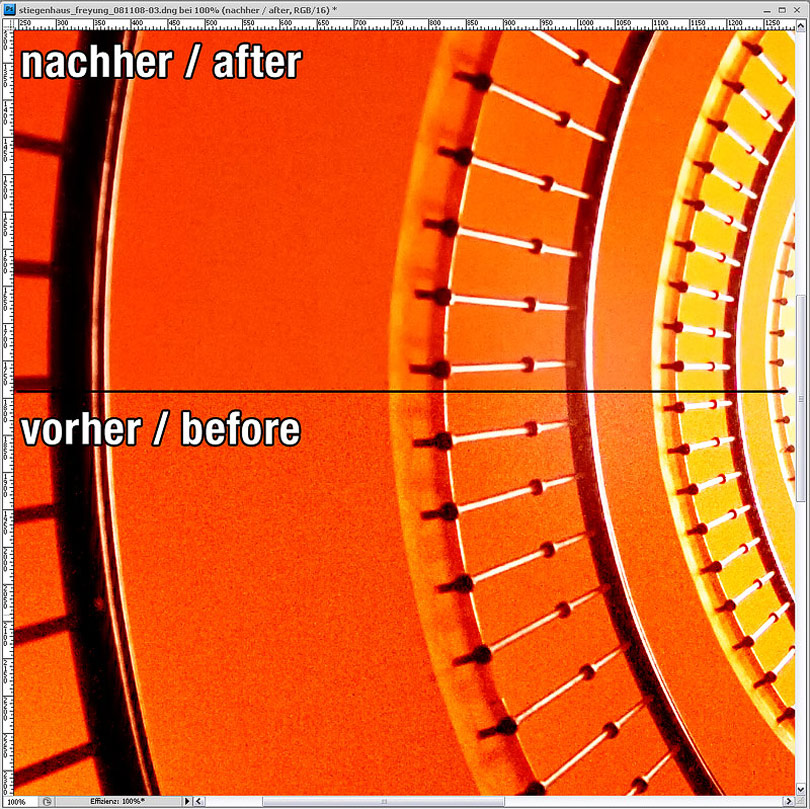
Move the slider to compare the original photo with the final result (Mozilla Firefox). In the Internet Explorer alternatively click on any position.