MAKING OF.
How I edited my photo "Macy's"
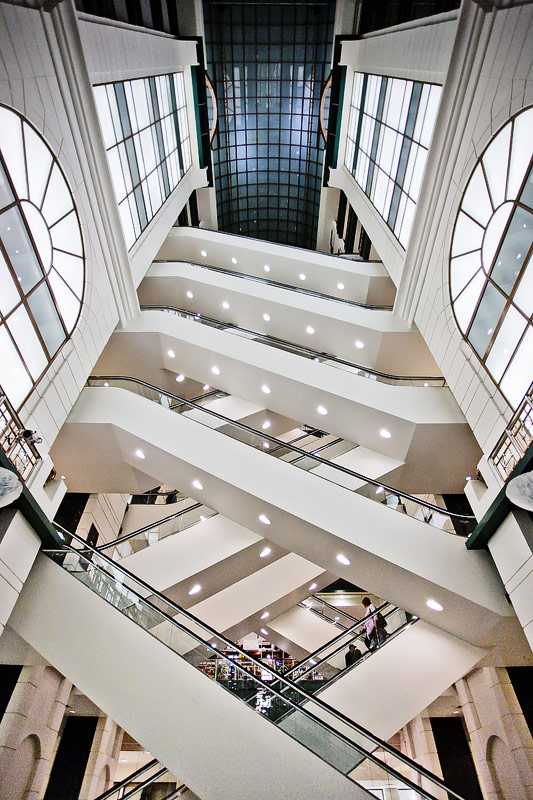
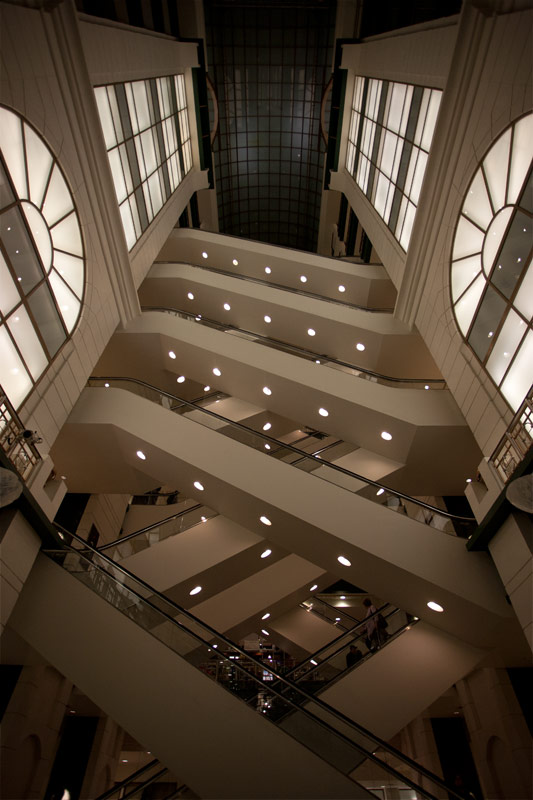
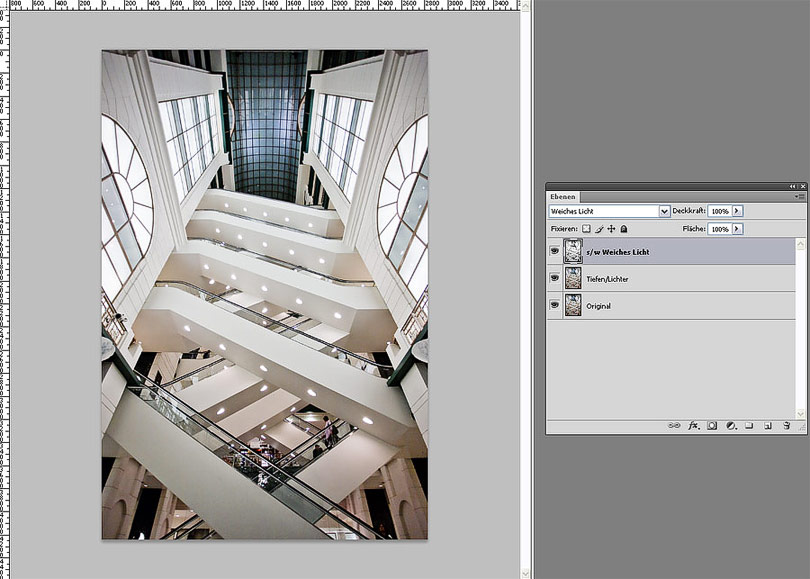
The photo was taken in the shopping center Macy's in Chicago. My intention was to create a bright image with a modern, clean and high-contrast look.
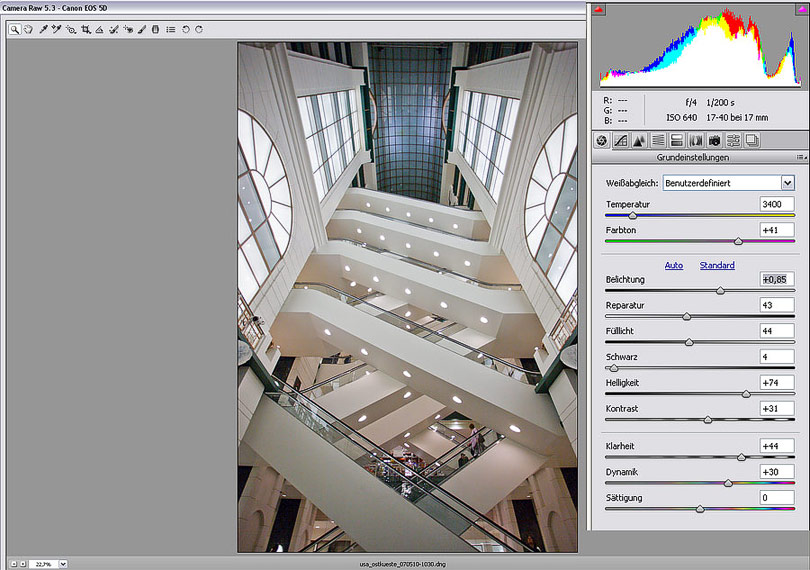
01
In the first step I make global adjustments in Adobe Camera Raw. All sliders except saturation are affected, furthermore I use the pipette to click in a neutral grey area to get a cold white balance.
02
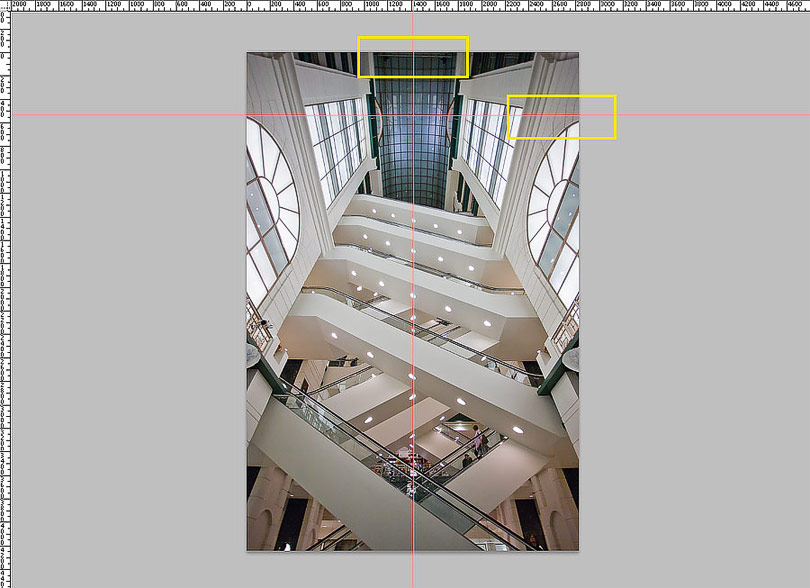
With guides I check if symmetry is existing. While the center is perfect the right side of the photo has to be adjusted.
03
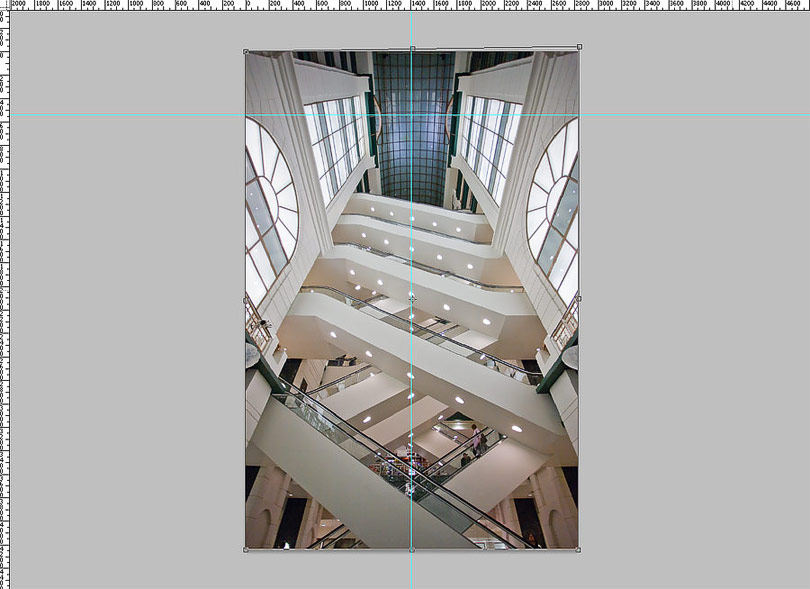
With "free transform" (CTRL/CMD-T) and hold down CTRL/CMD key I drag the upper right point until distortion is gone.
04
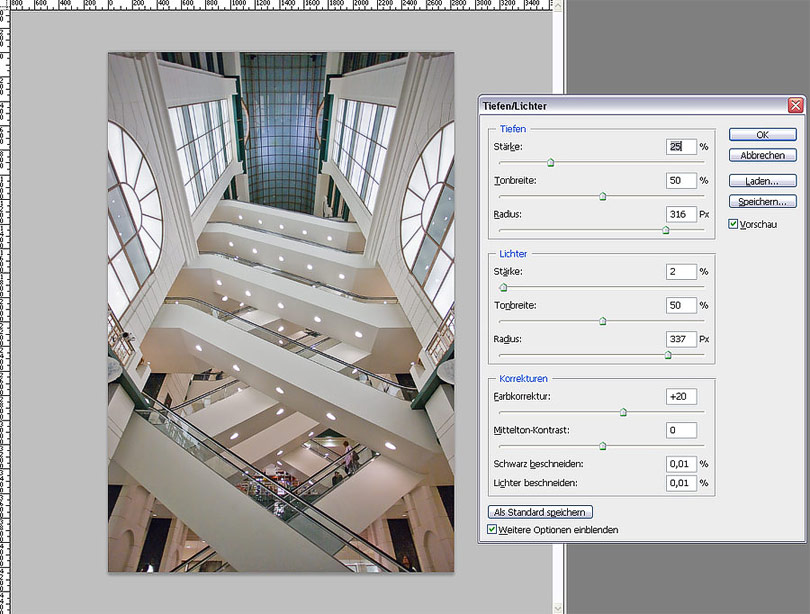
With the function "Shadows/Highlights" I balance brightness: dark areas become brighter and bright areas become darker.
05
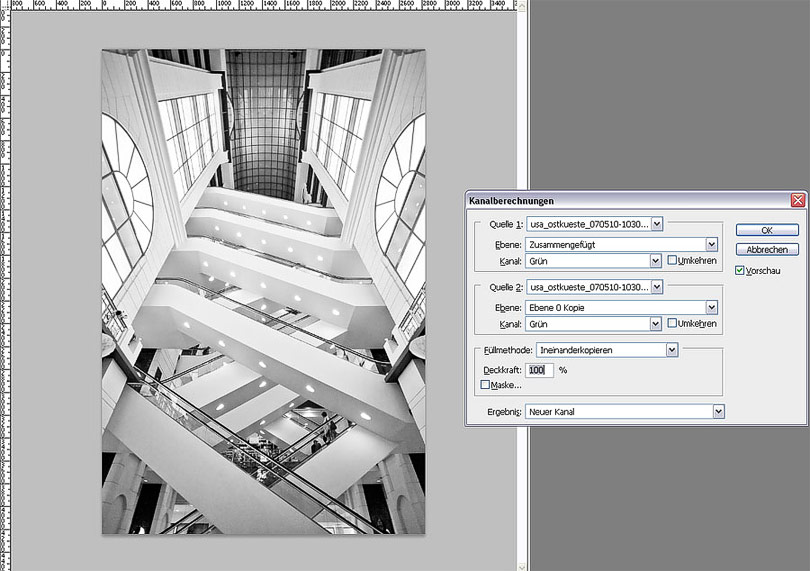
For enhancing the overall contrast I need a temporary black white conversion. I choose "Image - Calculations" and have a look which channel combinations end up in a good result. In this case I combine the green channel with itself in overlay mode.
06
The created black white conversion is selected (CTRL/CMD-A), copied (CTRL/CMD-C) and on the top of the layer palette pasted (CTRL/CMD-V). Layer mode is changed to soft light with an opacity of 65 percent.
07
With a slightly s-shaped curve I increase overall contrast again a bit.

08
All layers are merged together (CTRL/CMD-SHIFT-ALT/OPTION-E) and get unsharp masked with an amount of 30 percent and a radius of 60 px. This step creates a strong midtone contrast.
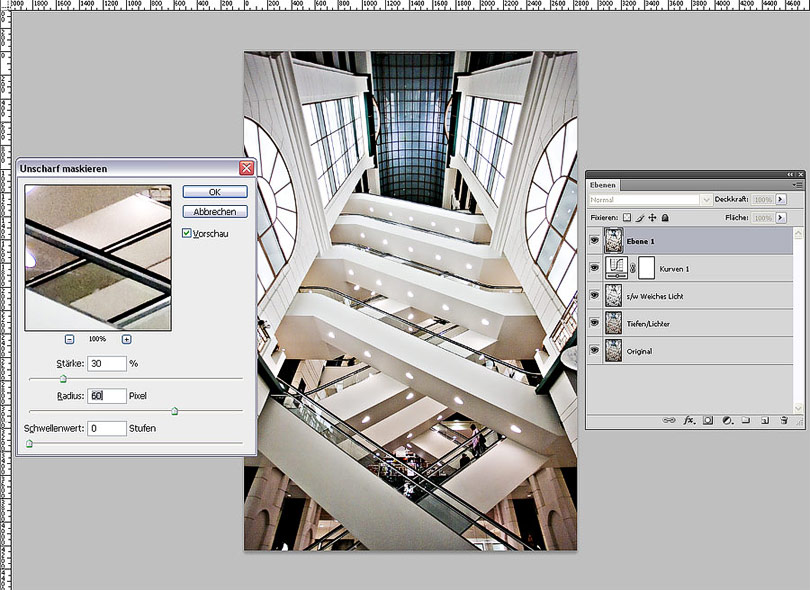
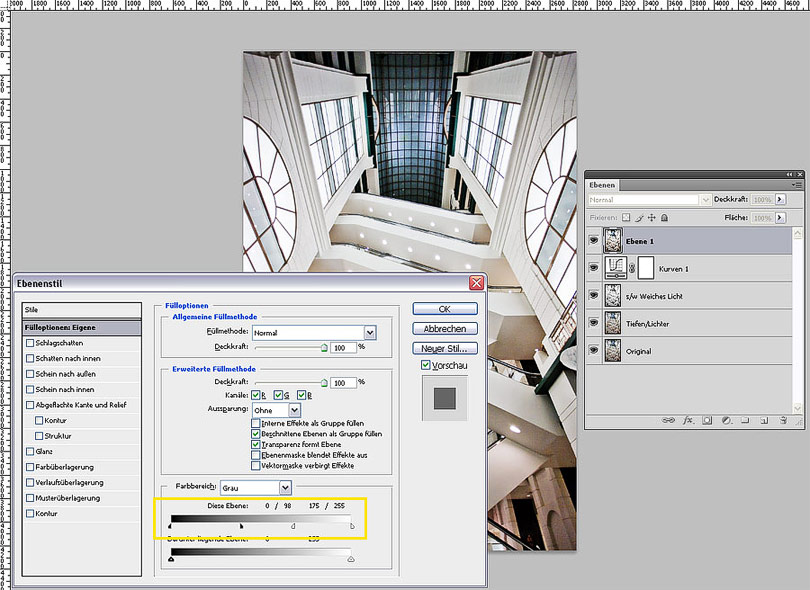
09
To avoid halos I exclude the effect from the shadows and highlights. To achieve this I open the blending options and with hold down ALT/Option key I drag the white and black slider a bit to the center so the enhanced edge contrast only applies in the mid tones.
10
With a noise reduction plug-in I blur large areas. I use Nik Dfine but other software like Noise Ninja or Neat Image is good, too. I would not recommend Photoshops function "Reduce noise" as its results are not clean.

11
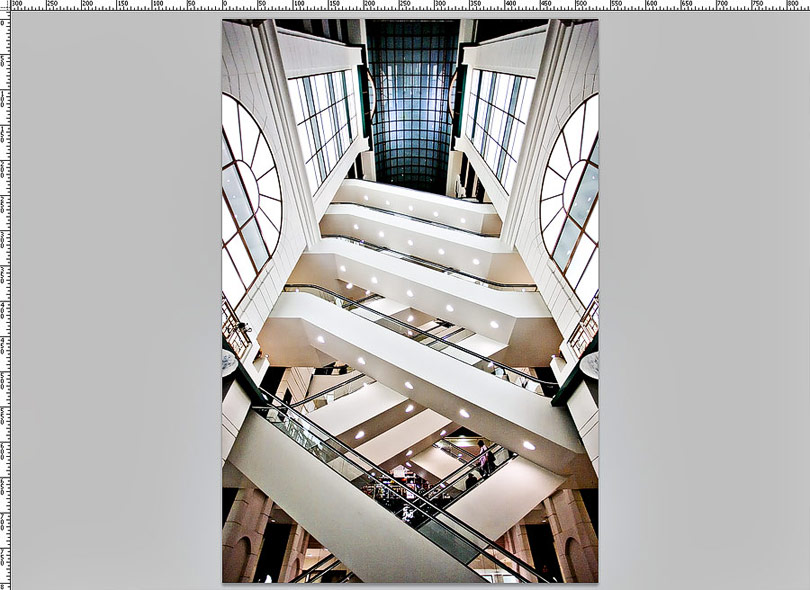
Everything's done and the image can be scaled down and sharpened for the internet.
12
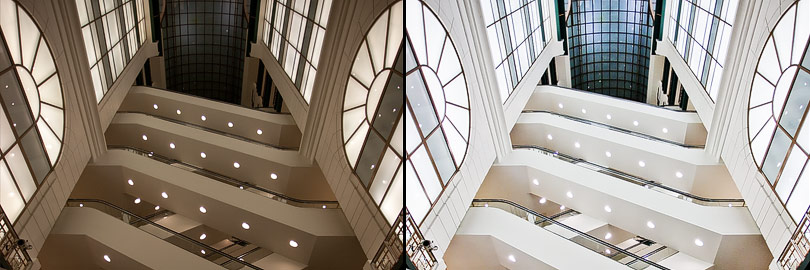
Move the slider to compare the original photo with the final result (Mozilla Firefox). In the Internet Explorer alternatively click on any position.