MAKING OF.
How I edited my photo "Pink Revelation"
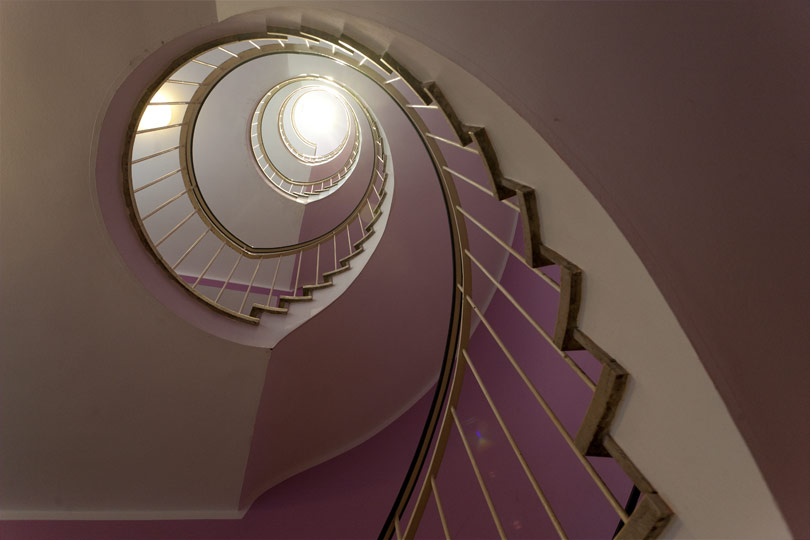
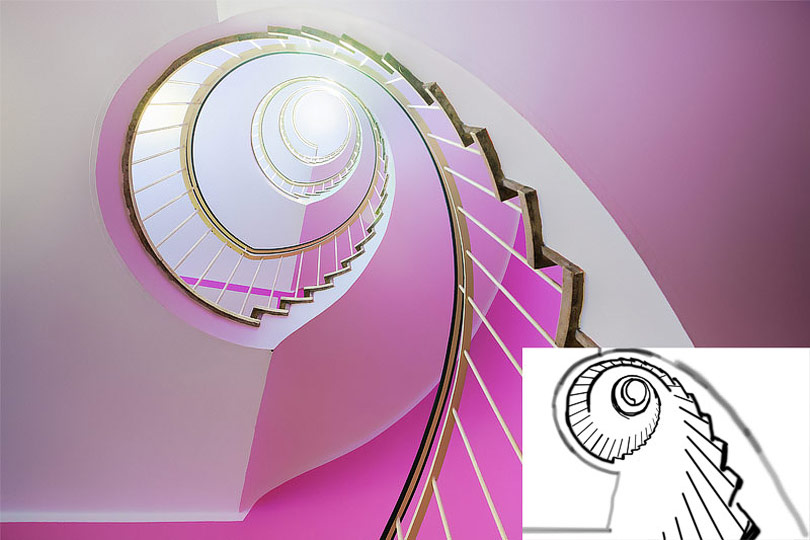
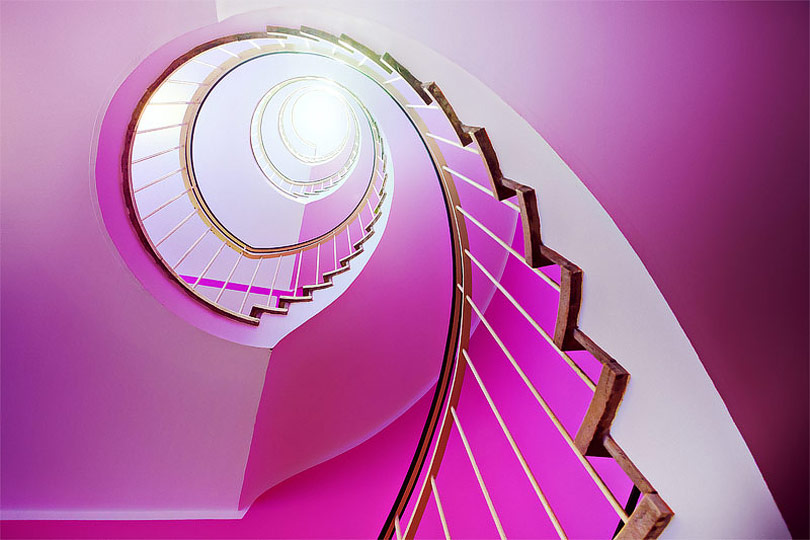
The photo was taken in the staircase of the Munich Glockenspiel Cafe. In the post-processing I want to remove cracks and dust and create a cleaner look. The pink walls are not an eye catcher and should be enhanced.
01
In the first step I activate the automatic lens correction in Adobe Camera Raw. Distortion and chromatic aberrations are corrected while I don't adjust the slider for vignetting.

02
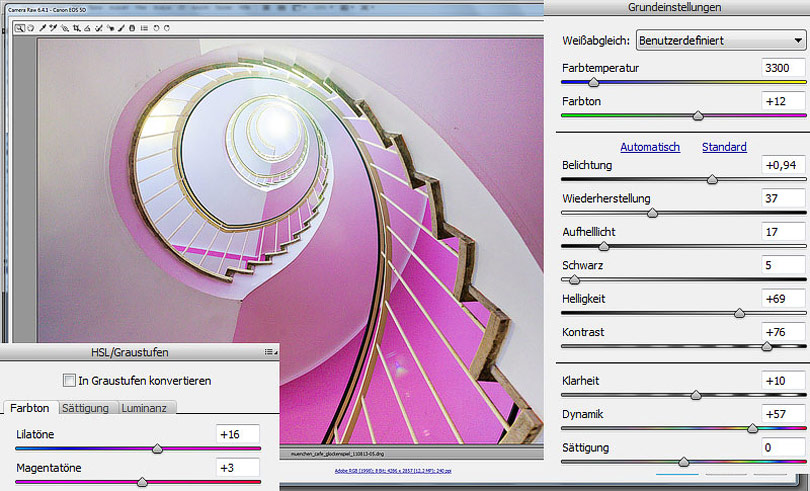
In the basic settings I make extensive adjustments to white balance, exposure, recovery, fill light, brightness, contrast, clarity and dynamics. In addition, I move the slider for the purple and magenta tones towards pink.
03
In Photoshop, the big cracks are removed with the patch tool. Select the affected areas and drag them to a similar but clean area. Repeat this step if visible cracks remain.
04
Now I want to soften the walls to remove uneven areas. On a duplicated layer I choose "Filter > Blur > Surface Blur" with a radius of 40 pixels and a threshold of 10 levels. With a layer mask I hide areas that should not be blurred (see screenshot on the layer mask)
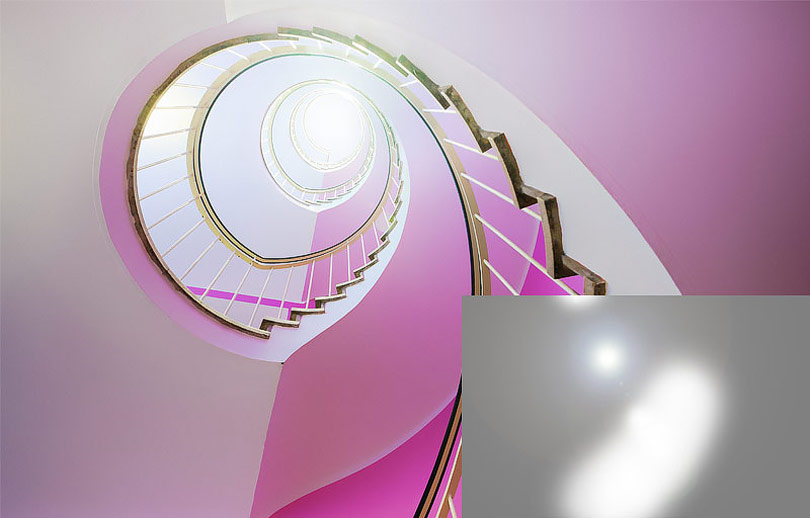
05
Next, I apply a lens flare to simulate a bright light source from the top of the staircase. I create a new layer with the "Overlay" mode and fill it via "Edit > Fill ... > 50% gray". Then I apply the "Filter > Render > Lens Flare ...> 105mm" and use the eraser tool to get rid of unwanted flares.
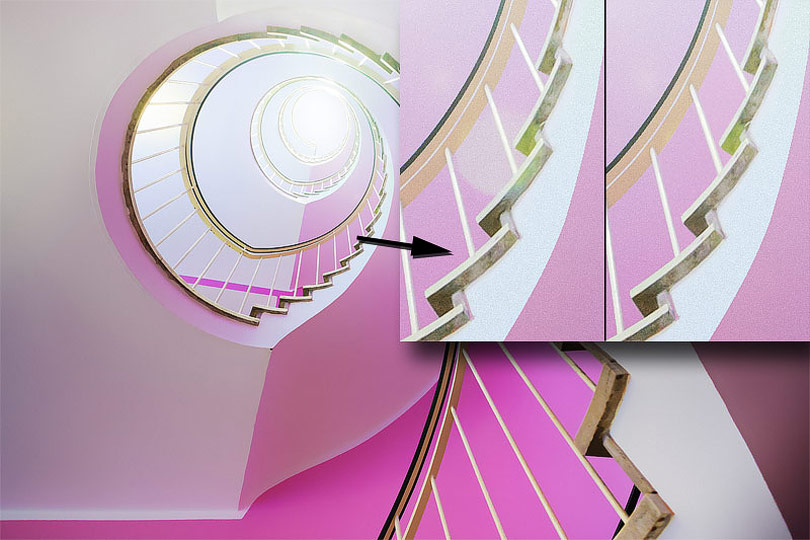
06
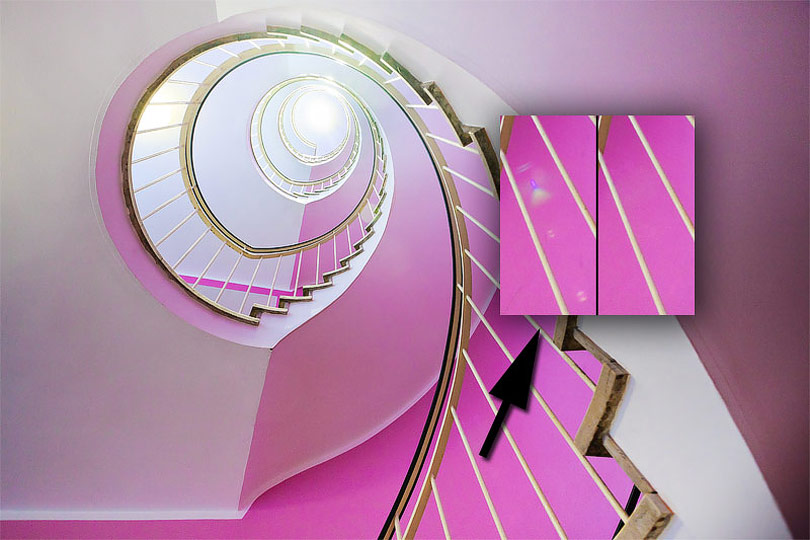
In the original photo there is still a visible flare on the staircase railing. To remove this, I use the lasso tool and generously select a similar area of the railing, copy it to a new layer (CTRL-/CMD-J) and shape it with the transform tool (CTRL-/CMD-T).
07
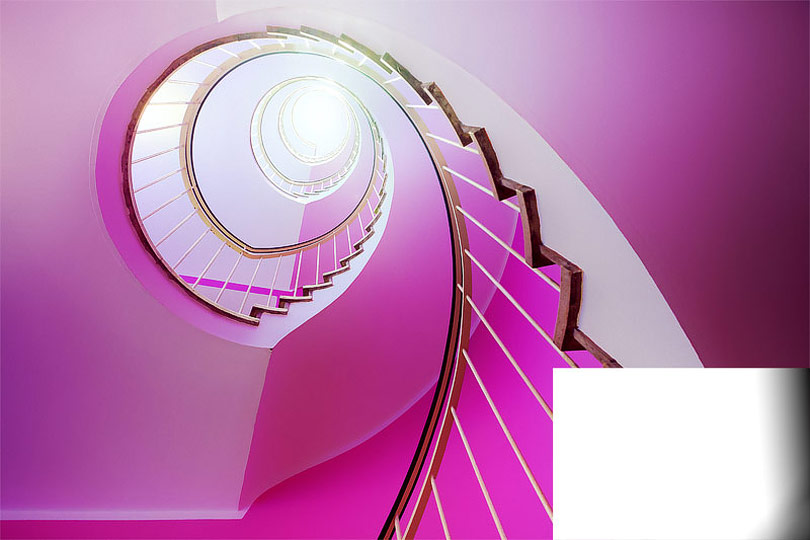
In the adjustment layer "color balance" I move the shadow and highlight sliders so that the pink color is enhanced.

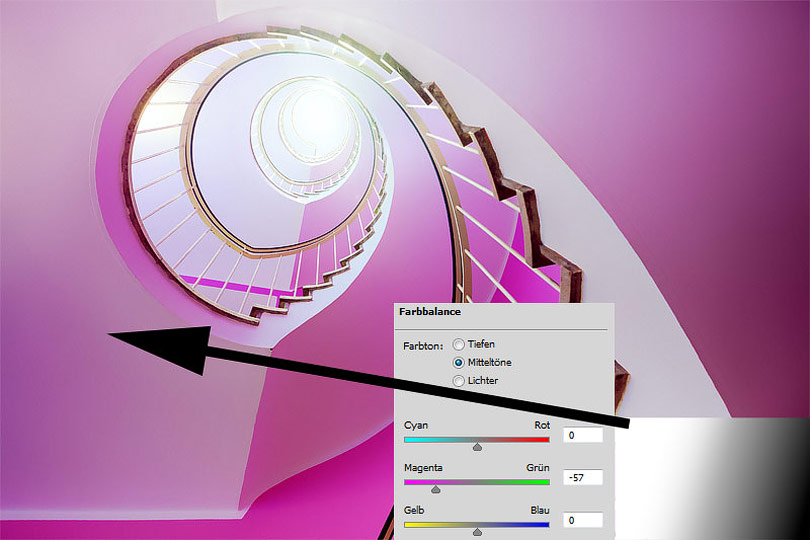
08
Since the very left area still looks pretty dull, I again use the adjustment layer "color balance". This time I dramatically drag the midtones slider towards magenta. With a layer mask I ensure that only the left region is affected by the changes.
09
I darken the whole image with curves.
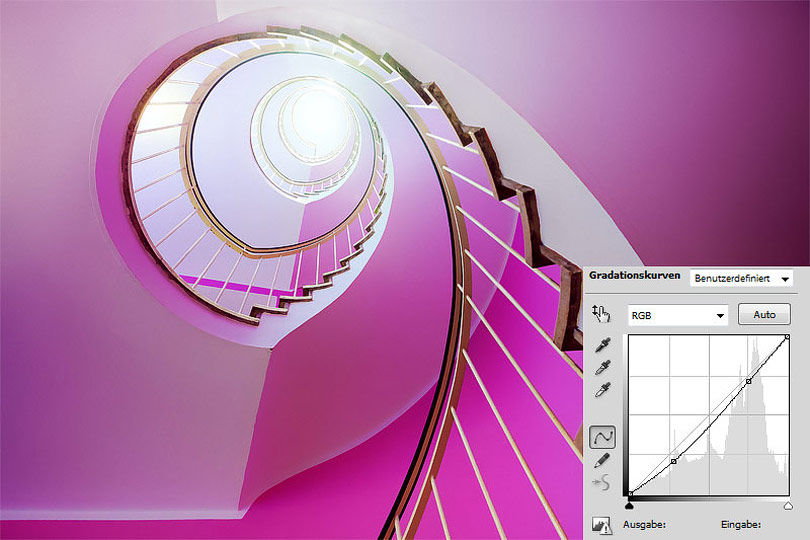
10
With a layer mask I hide the darkening from the very right areas.
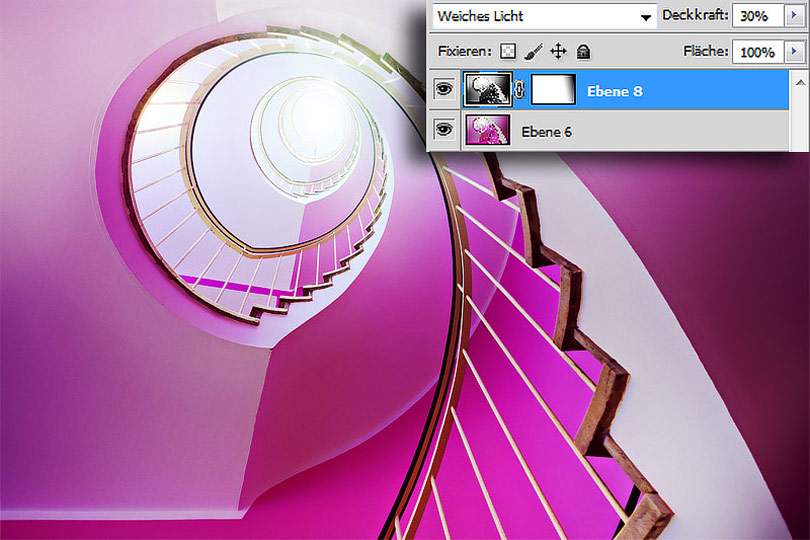
11
To get glowing colours, I merge all layers (CTRL-/CMD-SHIFT-ALT-E) and strongly blur with the Gaussian Blur filter. I change the layer mode to "Soft Light". In the layer style dialog shadow and some highlight areas are excluded by blending.
12
I apply "Image > Calculations ..." and combine the gray channel with itself in the "Overlay" mode. This results in a strong black and white conversion.
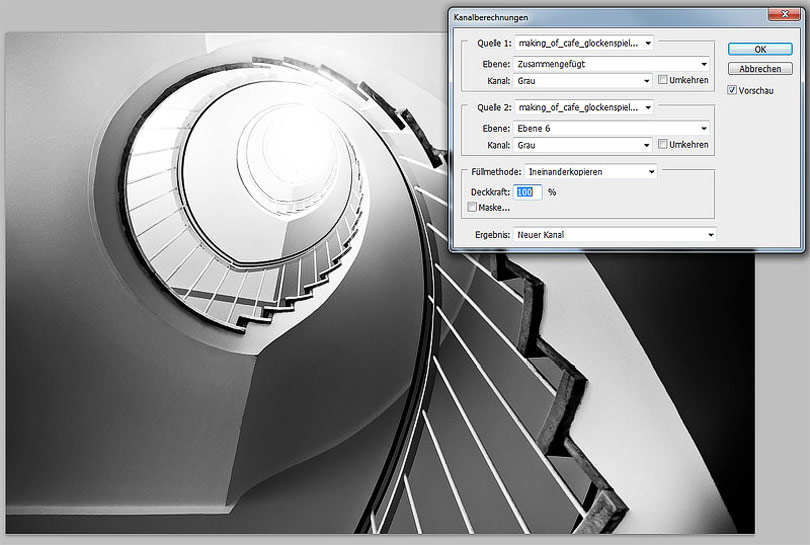
13
I select the channel (CTRL-/CMD-A), copy it (CTRL-/CMD-C) and paste it (CTRL-/CMD-V) in the layers palette. I change the mode to "Soft Light" which increases the overall contrast in the image. Finally I reduce the opacity to 30 percent and with a layer mask I exclude the right parts from being darkened too much.
14
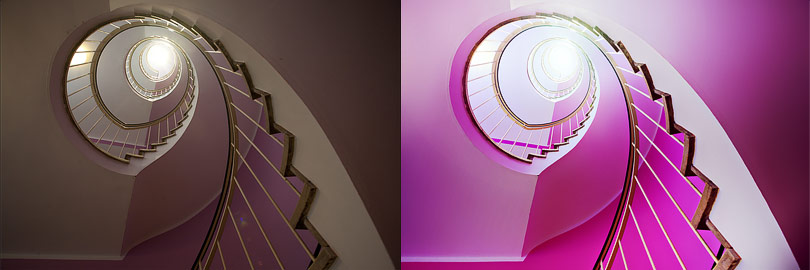
Move the slider to compare the original photo with the final result (Mozilla Firefox). In the Internet Explorer alternatively click on any position.